


How to register as a vendor
01
Step 1: Register
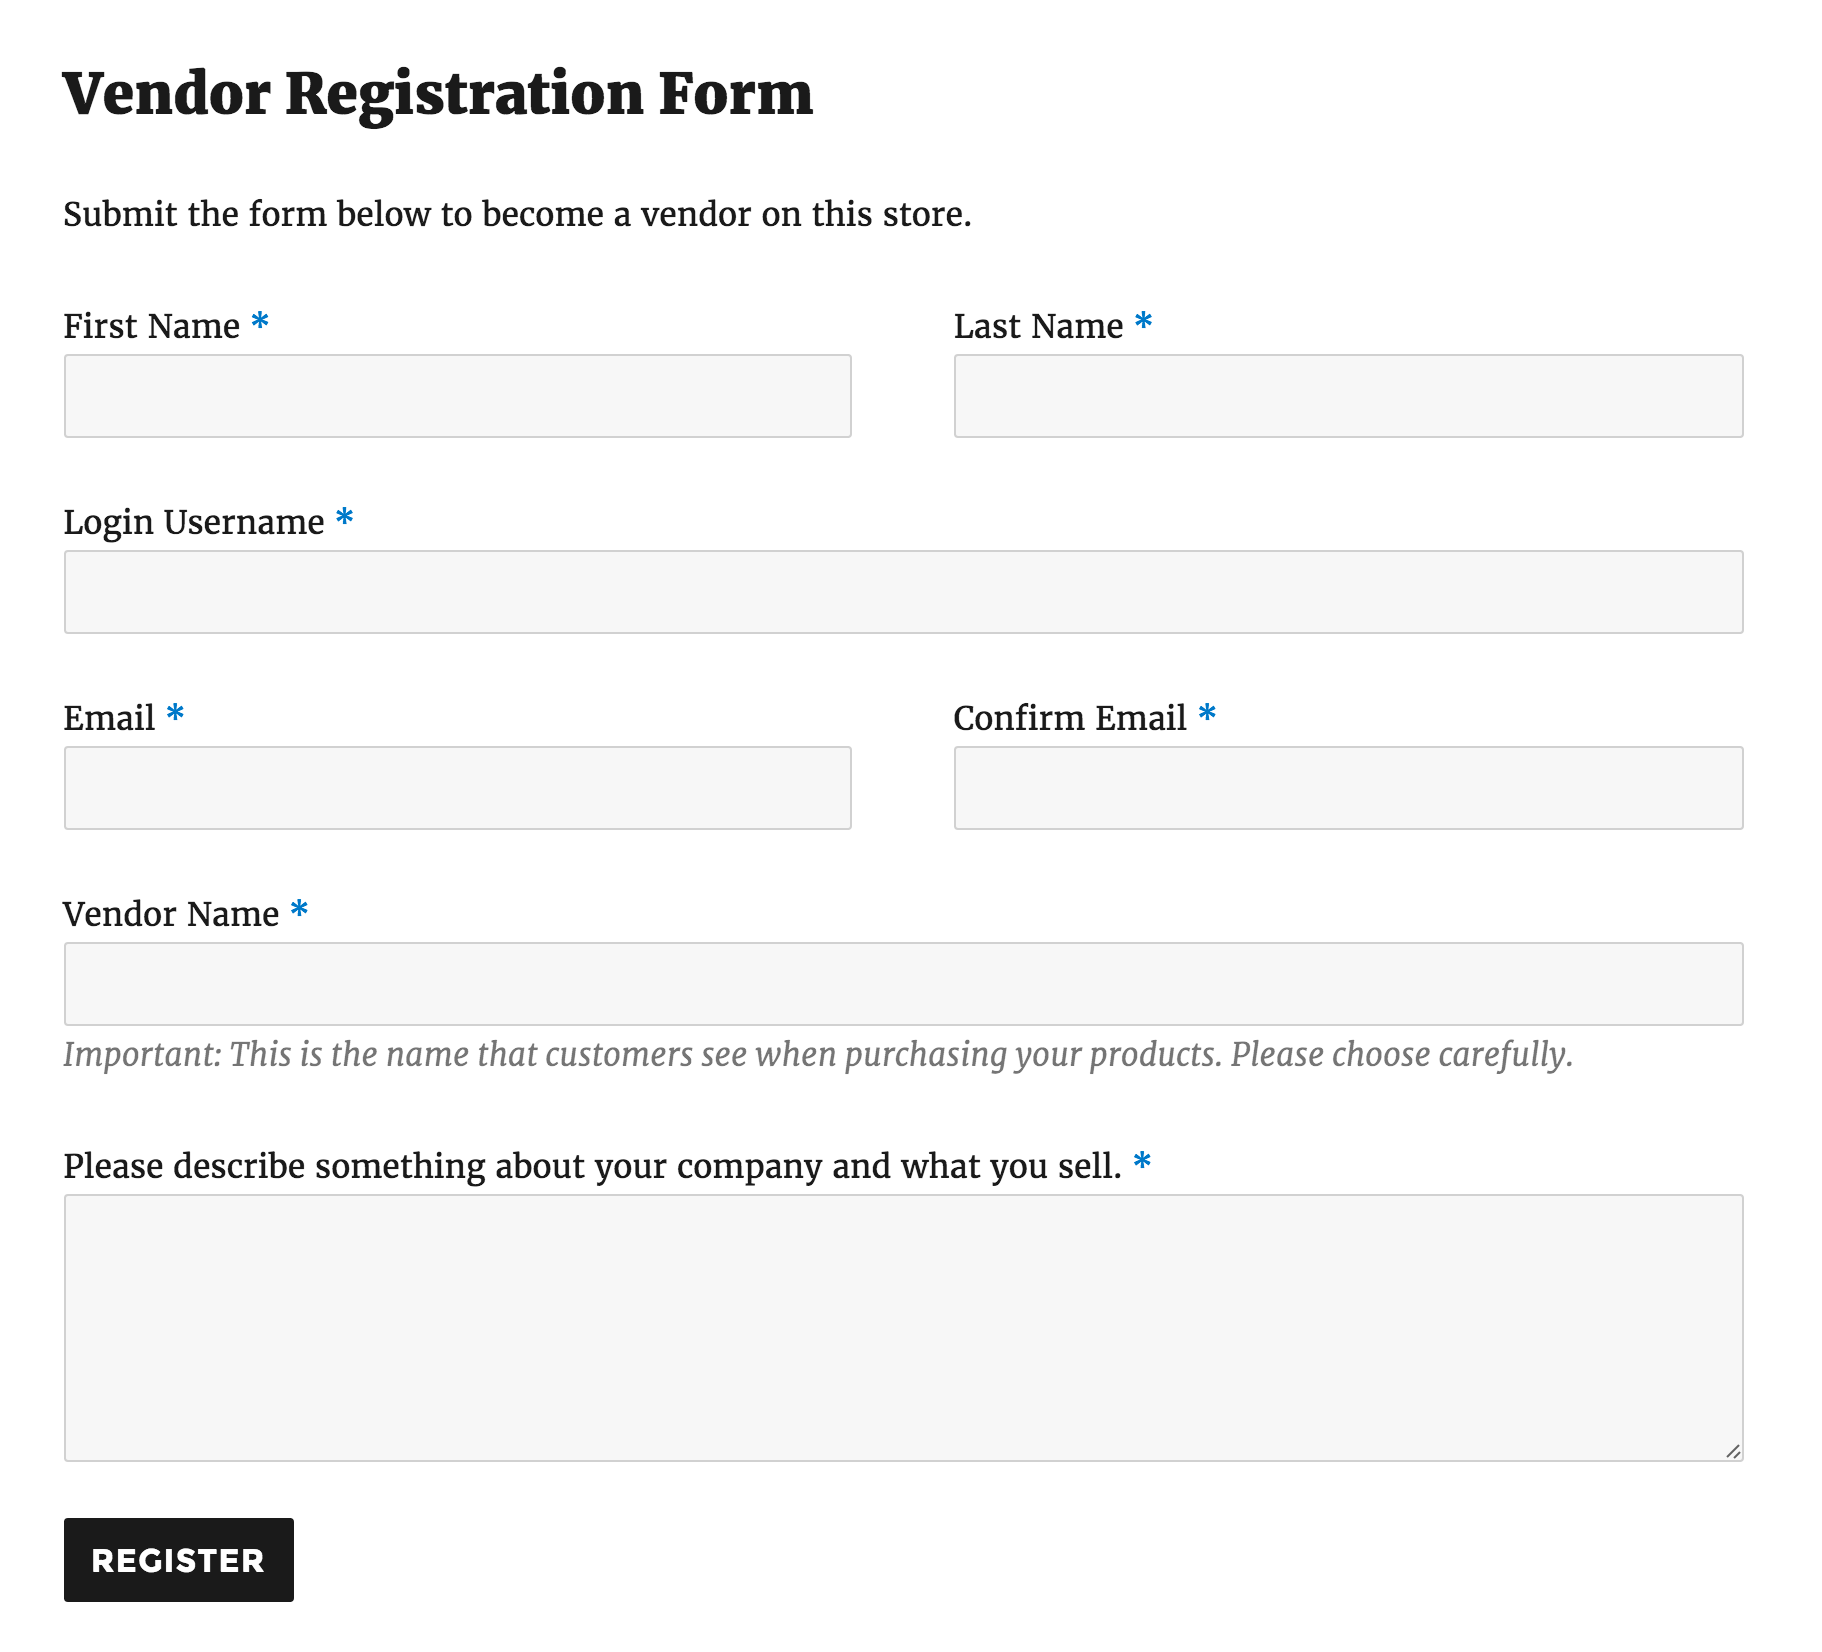 Vendor Name must be unique and determines the vendor name for the store, e.g., If they enter “ZimMade,” this is the name used throughout the store.
Once the vendor has submitted the form, the store owner gets an email notification that a vendor has applied and a user account is created for this vendor.
Click here to register to be a vendor.
Vendor Name must be unique and determines the vendor name for the store, e.g., If they enter “ZimMade,” this is the name used throughout the store.
Once the vendor has submitted the form, the store owner gets an email notification that a vendor has applied and a user account is created for this vendor.
Click here to register to be a vendor.02
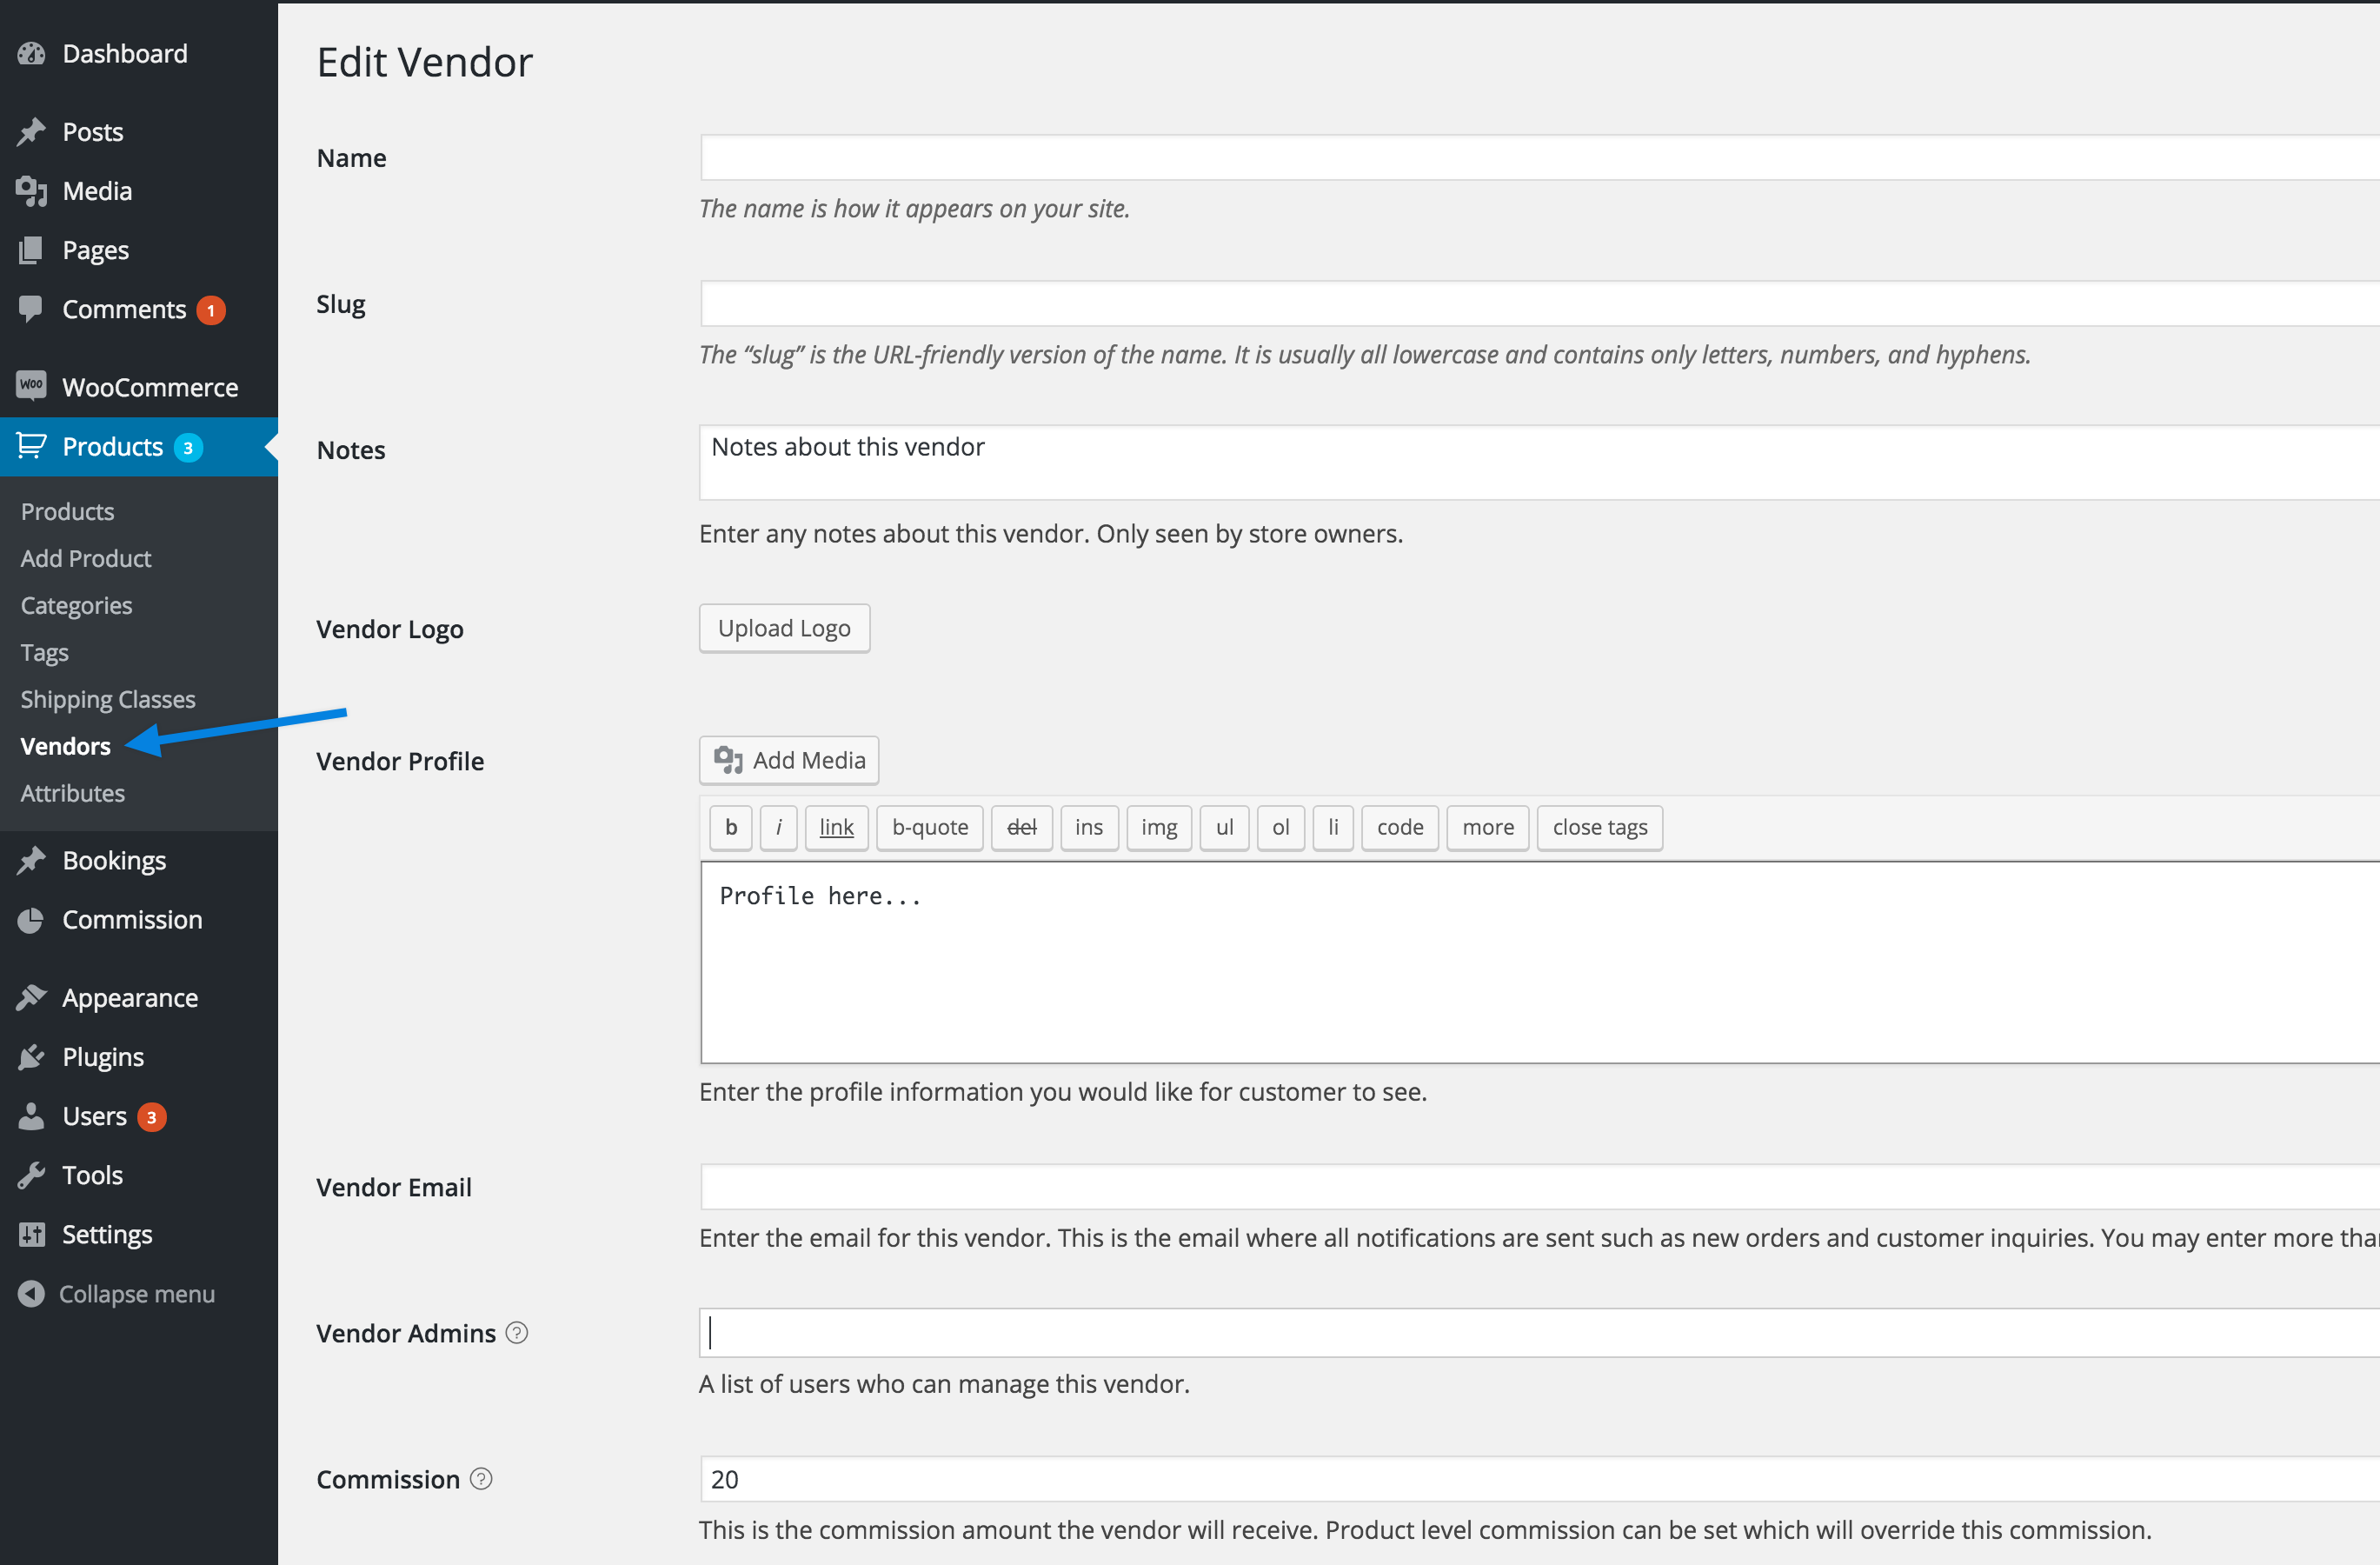
Step 2: Product Vendor Settings
03
Step 3: Adding a simple product
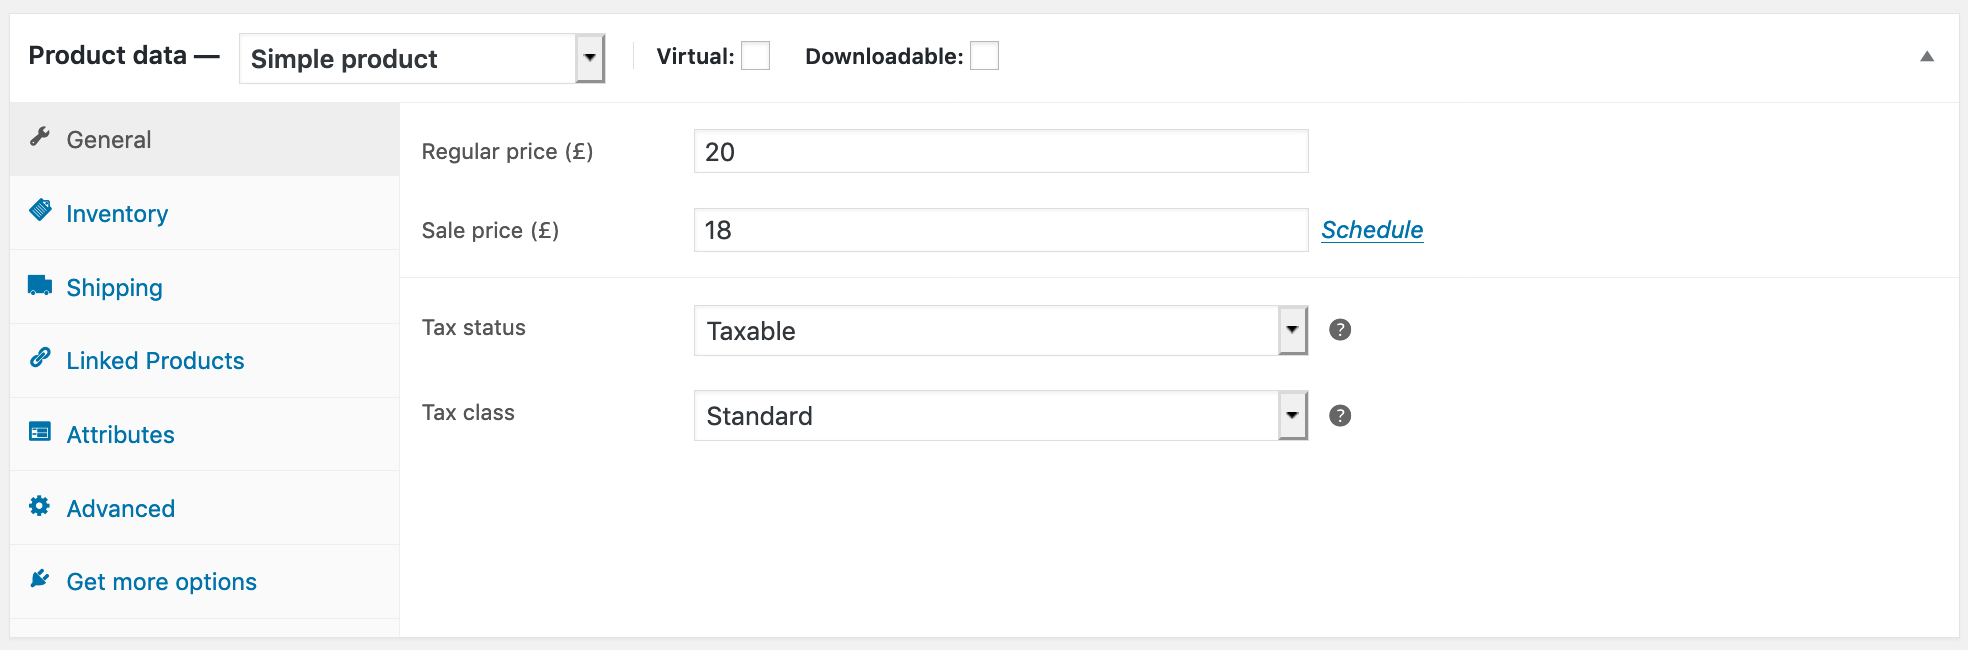
- Add Product Enter a product Title and Description
- Regular Price – Item’s normal / regular price Sale Price – Item’s discounted price that can then be scheduled for certain date ranges. The sale expires at 11:59pm of the specified end date
- Tax status – Taxable / Shipping only / None
- Inventory section – The inventory section allows you to manage stock for the product individually and define whether to allow back orders and more. It enables you to sell products and allow customers to add them to the cart to buy.
- Enable Stock Management must be selected in Products Inventory Settings; otherwise, only the ‘Stock status’ option is visible in the Product Data Inventory box.
- Options when stock management at product level is disabled. You are responsible for updating the Stock Status.
04
Step 4: Stock Management
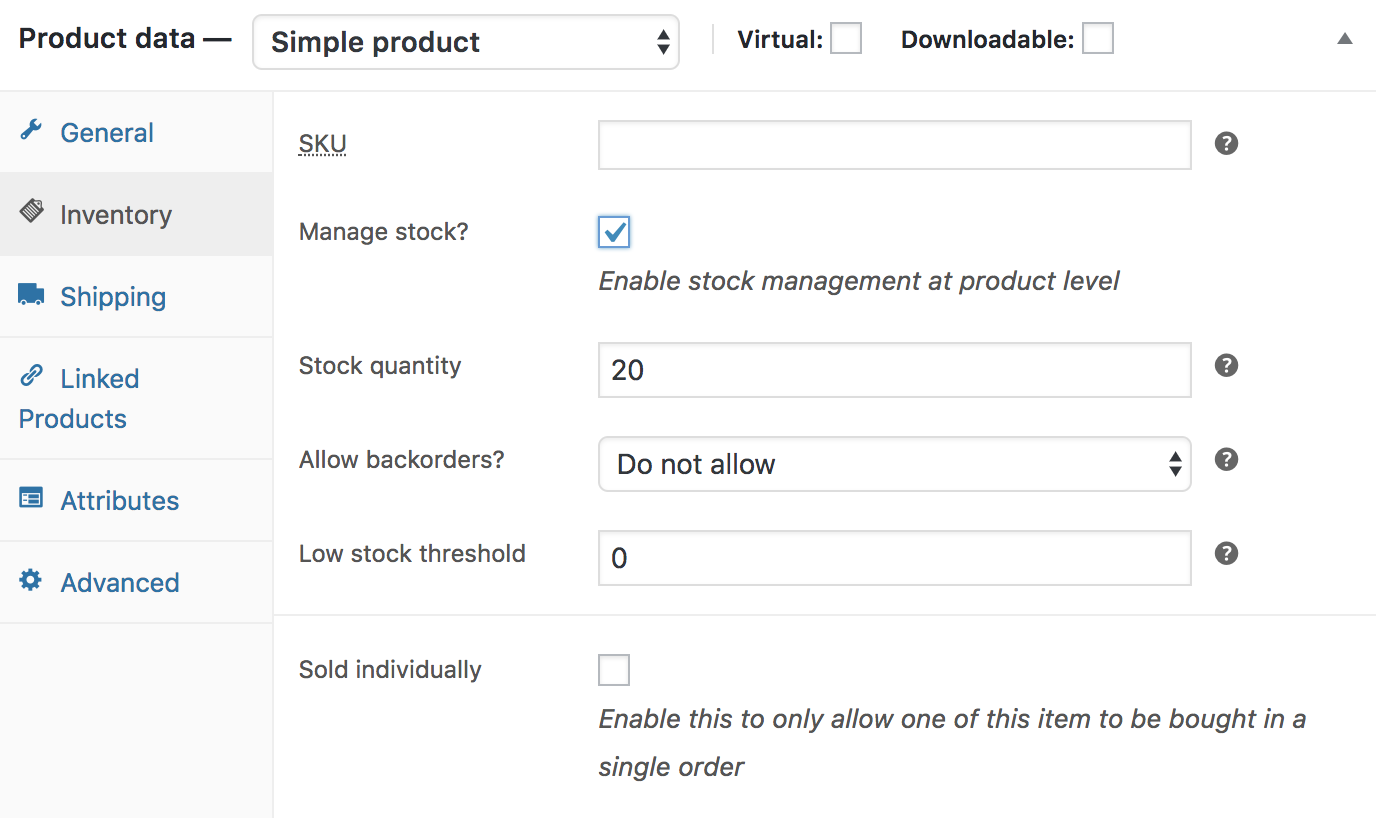 Options when stock management at product level is enabled.
Enter the Stock Quantity, and the system auto-manages inventory and auto-updates Stock Status as Stock, Out of Stock or On Backorder.
Select whether to Allow Backorders.
Low stock threshold – Enter a number upon which you are notified.
Tick the Sold Individually box to limit the product to one per order.
Options when stock management at product level is enabled.
Enter the Stock Quantity, and the system auto-manages inventory and auto-updates Stock Status as Stock, Out of Stock or On Backorder.
Select whether to Allow Backorders.
Low stock threshold – Enter a number upon which you are notified.
Tick the Sold Individually box to limit the product to one per order.05
Step 5: Shipping
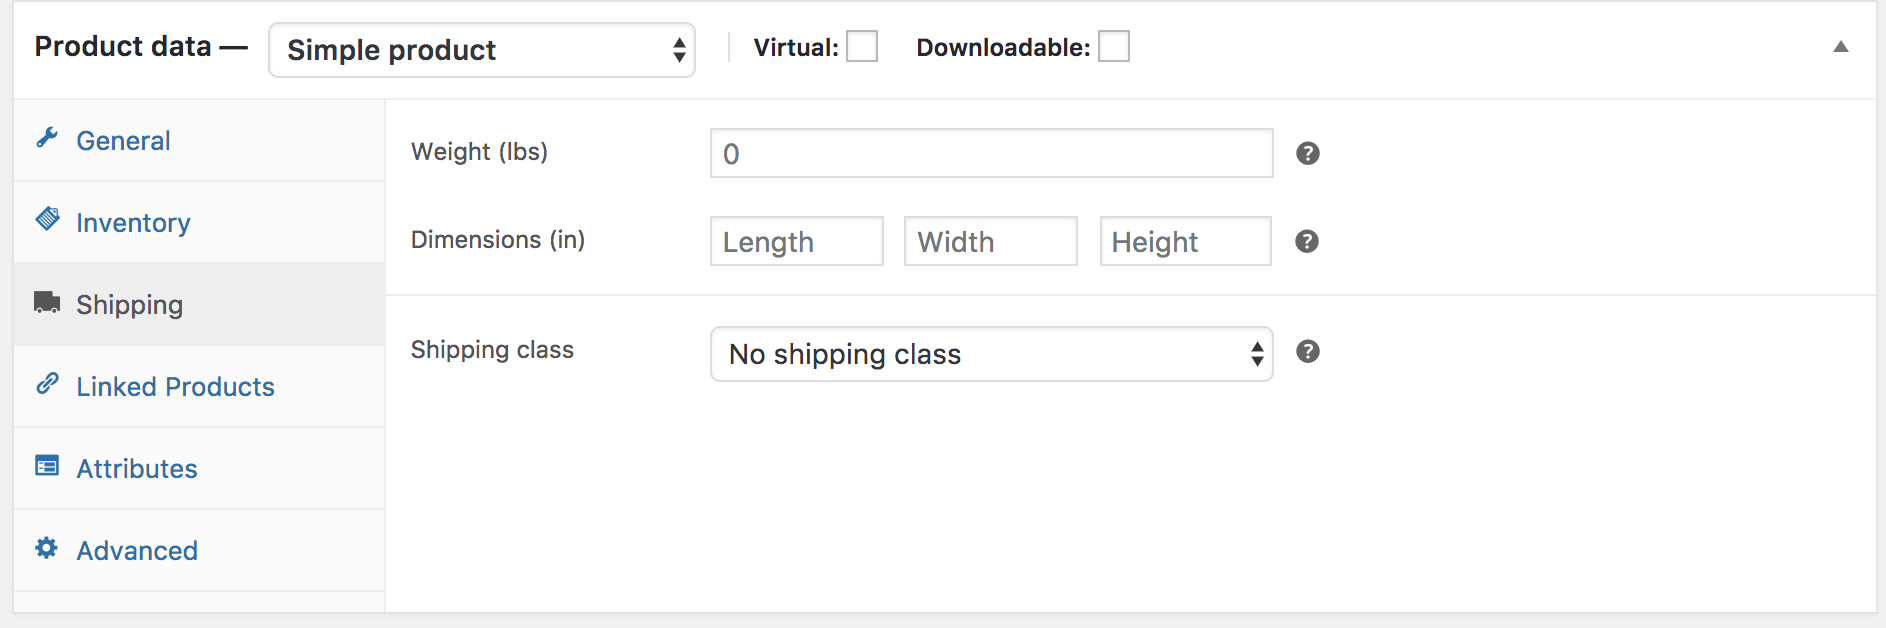 Shipping section
- Weight – Weight of the item.
- Dimensions – Length, width and height for the item.
- Shipping Class – Shipping classes are used by certain shipping methods to group similar products.
06
Step 6: Product short description
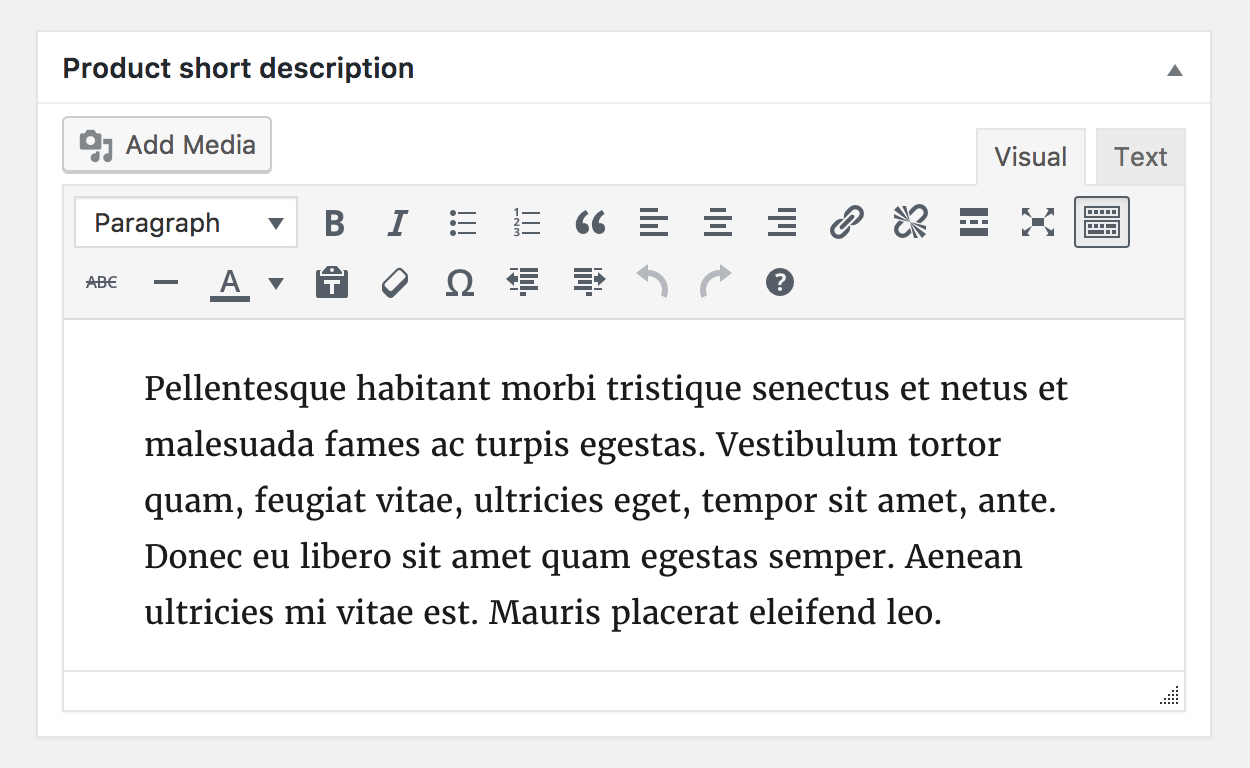 Add an excerpt. This typically appears next to product imagery on the listing page, and the long description appears in the Product Description tab.
Video embeds (oembed) may be used
Add an excerpt. This typically appears next to product imagery on the listing page, and the long description appears in the Product Description tab.
Video embeds (oembed) may be used07
Step 7: Categorise Your Products
 On the right-hand side of the Add New Product panel, there are product categories in which you can place your product, similar to a standard WordPress post. You can also assign product tags in the same way.
08
Step 8: Adding Product Images and Galleries
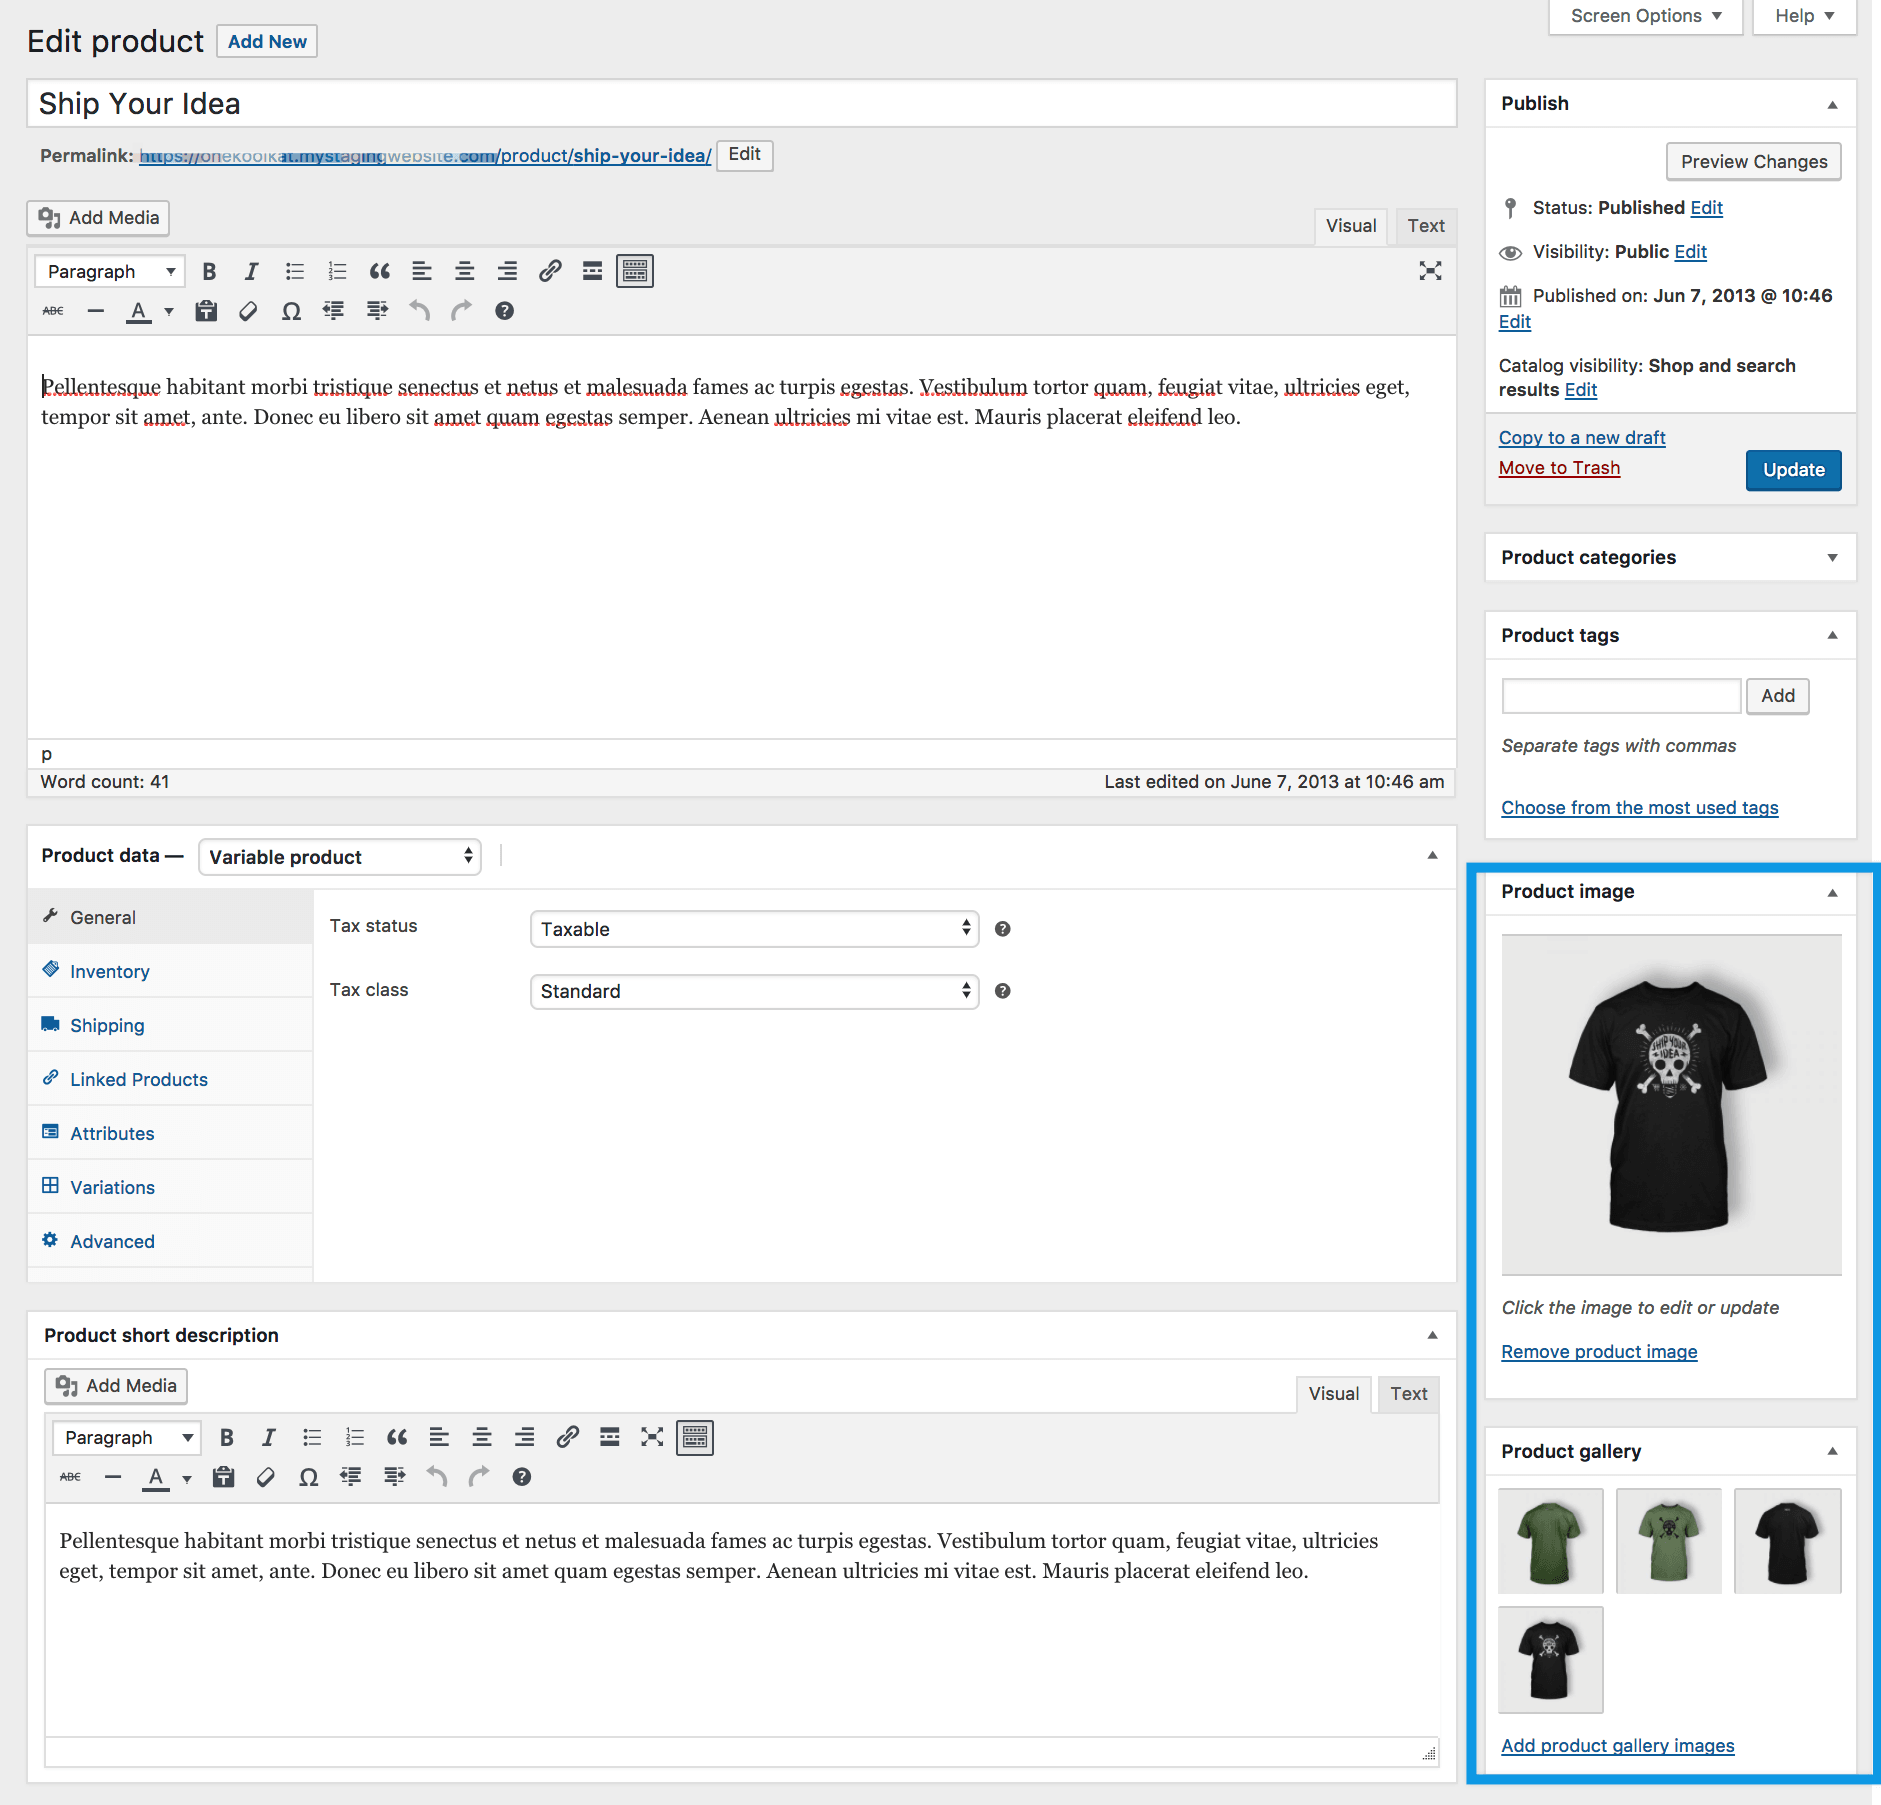 Adding product images and galleries are options available on the right-hand side when adding or editing a product in your store from WooCommerce > Products.
How to register as a buyer
Customer Login / Registration
A customer can register during Checkout or via the My Account page.


